
How to Use Mind Mapping to Enhance Your Study Sessions
Let’s face it—studying can be a bit overwhelming sometimes. Whether you’re cramming for exams or trying to understand a tricky concept, it’s easy to feel like everything is just one big jumble in your head. But what if there was a simple way to make all that information click and actually stick? That’s where mind mapping comes in.
Imagine being able to break down complex topics into clear, easy-to-follow visuals that make sense in an instant. Mind mapping is like a supercharged note-taking method that helps you organize your thoughts, connect ideas, and improve your memory—without the stress. It’s not just for artists or designers; it’s for anyone who wants to study smarter, not harder.
In this article, we’re going to dive into how mind mapping can transform your study sessions. You’ll learn why it works, how to create your own mind maps, and even how to use this technique for different subjects. So grab a pen, get ready to unleash your creativity, and let’s make studying something you actually enjoy. Ready to map out your success? Let’s go!
1. What is Mind Mapping?

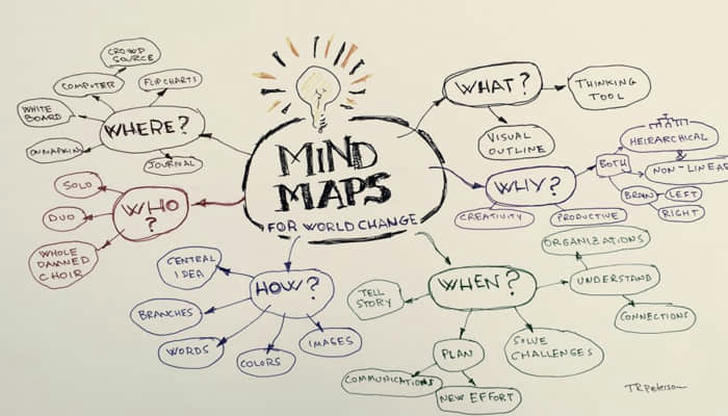
At its core, mind mapping is a visual technique used to organize and connect information in a way that makes it easier to understand and remember. Imagine starting with a big central idea in the middle of a page, and then branching out with related concepts, keywords, or details. Each of these branches can further expand, creating a tree-like structure that shows how everything is interconnected.
Think of it like a spider web—each thread represents a different piece of information, but all the threads are connected to the central idea. The beauty of mind mapping is that it’s not just about writing down notes; it’s about visually organizing those notes in a way that mirrors how our brains actually work. Our minds naturally make connections between ideas, and mind mapping helps bring that process to life on paper (or screen).
The basic structure of a mind map typically includes:
• A central idea or topic: This is usually placed in the center of the map and represents the main subject you’re studying.
• Main branches: These are the core concepts or categories related to the central idea, like major themes or chapters in your study material.
• Sub-branches: These break down each main branch into smaller details or examples, helping you dive deeper into the subject.
• Images, keywords, and colors: These elements help make the map more memorable and visually appealing, reinforcing key points and making connections clearer.
Mind mapping isn’t just about creating a pretty picture—it’s about turning information into something you can quickly understand and recall, especially when you need it most.
2. Why Mind Mapping Works for Studying
So, why does mind mapping actually work when it comes to studying? The answer lies in the way our brains process and store information.
• Visual Learning: We remember pictures and images better than plain text. Mind maps use images, colors, and shapes to turn abstract concepts into something tangible. This taps into our visual learning skills, helping to create stronger mental images of what we’re studying.
• Better Memory Retention: Studies have shown that visual cues can improve memory retention. By connecting ideas through visuals, you’re reinforcing the information in multiple ways, making it easier to recall later. It’s like giving your brain an extra tool for filing and retrieving info when you need it.
• Simplifies Complex Information: When studying, we often face dense, complicated material. Mind mapping breaks it all down into smaller, digestible chunks. Rather than reading through paragraphs of text, you can quickly see the big picture and how all the smaller pieces fit together.
• Encourages Active Learning: Mind mapping isn’t passive; it forces you to actively engage with the material. As you draw the branches and make connections, you’re processing the information and thinking critically about how it all fits together. This active involvement boosts understanding and helps you stay focused.
• Helps with Organization: We’ve all been there—pages of notes that seem to go on forever and still don’t make sense. Mind mapping organizes information in a clear, hierarchical way. You start with the main idea in the center and work your way out, giving you a clear roadmap of the material. This not only makes it easier to study, but it also helps when you need to find specific information quickly.
In short, mind mapping is like giving your brain a GPS to navigate through a sea of information. It helps you break down, organize, and retain complex concepts, making studying less overwhelming and way more effective.
3. How to Create a Mind Map for Study Sessions

Creating a mind map for your study sessions is simple and fun! Here’s a step-by-step guide to get you started:
Step 1: Start with the Central Topic
Begin by writing the main topic or question you’re studying in the center of the page. This could be the subject of your exam, a key concept, or the title of a chapter. You can draw a circle or a box around it to highlight it.
Step 2: Add the Main Branches
Next, draw lines (or branches) extending from the center, each representing a major subtopic or category related to the central topic. For example, if you’re studying biology, your main branches might be "Cell Biology," "Genetics," "Evolution," etc. These are the broad areas that make up the bigger picture.
Step 3: Add Sub-branches and Details
Now, for each main branch, start adding smaller sub-branches with more specific information, keywords, or definitions. For instance, under "Cell Biology," you might have sub-branches like "Cell Structure," "Function," and "Types of Cells." Break down the content into bite-sized pieces.
Step 4: Use Colors and Images
This is where mind mapping becomes creative! Use different colors to differentiate between main branches or to highlight key concepts. You can also draw small images, symbols, or doodles to make the map more visually appealing and memorable. Visual cues like these make it easier to recall information.
Step 5: Review and Adjust
Once your mind map is complete, take a moment to review it. Are there any important details missing? Is the structure easy to follow? Make adjustments as needed. This process itself will help reinforce your learning.
By following these steps, you’ll have a clear, visual representation of your study material that’s easy to revise and remember.
4. Practical Examples of Using Mind Mapping for Different Subjects

Mind mapping is versatile and can be applied to almost any subject. Here are a few practical examples of how to use it for different areas of study:
• Math and Science: Break down formulas, equations, and scientific concepts. For example, in physics, you could create a mind map to visualize the relationships between different laws, like Newton’s Laws of Motion, and how they connect with real-world examples.
• History: Create timelines to show the sequence of events. You could map out the causes and effects of major historical events, such as World War II, with branches for political, social, and economic impacts.
• Literature: Analyze characters, themes, and plot structures. For a novel like Romeo and Juliet, you could create a map with branches for each character, their motivations, and key events in the story, helping you see the relationships and themes at a glance.
• Language Learning: Build vocabulary maps that group words by themes (e.g., food, travel, emotions) or conjugation patterns. This will help you reinforce connections between words and their usage.
By adapting mind mapping to suit the subject at hand, you’ll make learning easier and more organized.
5. Tips for Making the Most of Mind Mapping in Study Sessions

To get the most out of your mind mapping sessions, here are a few quick tips:
• Keep it Simple: Don’t overcomplicate your maps. Focus on the main points and avoid clutter.
• Be Consistent with Symbols: Use a consistent set of symbols or colors so your maps are easy to read and understand.
• Combine with Other Techniques: Pair mind mapping with active recall or spaced repetition for even better retention.
• Revise Often: Your mind map can evolve as you learn more. Update it with new details and refine it for clarity.
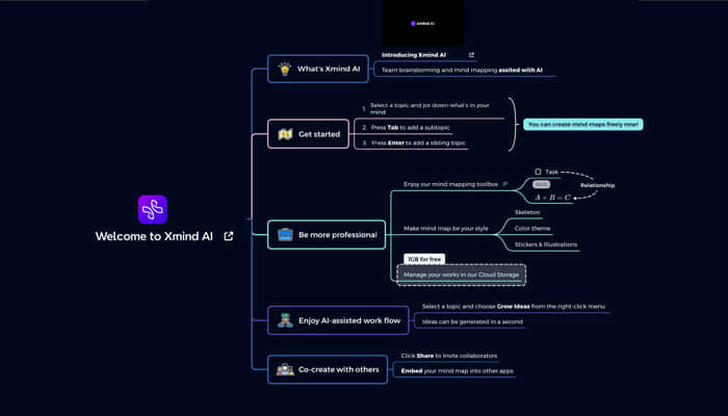
• Use Digital Tools: If you prefer digital maps, try tools like MindMeister or XMind to create, store, and share your mind maps easily.
6. Common Mistakes to Avoid
Mind mapping is a powerful tool for studying, but like anything, there are a few common missteps that can hold you back from getting the most out of it. Let’s break down some of these mistakes so you can steer clear of them.
First up, overcrowding your map is something that happens all too easily. It’s tempting to add every little detail that comes to mind, but doing so can quickly turn your mind map into a jumbled mess. Instead, focus on the most important ideas and keep it simple. Remember, the goal is clarity, not complexity. Your mind map should make the connections between concepts clearer, not more confusing.
Another mistake is ignoring visuals and colors. One of the best features of mind maps is their ability to engage your brain visually. If you’re only using words, you’re missing out on a chance to make your map more memorable. Try adding colors, symbols, or even images to make the information stand out. This extra layer of creativity helps you not only remember better but also makes the study process more fun.
It’s also easy to make things too complicated. A mind map should simplify your understanding, not add layers of complexity. If you find your branches are too detailed or intricate, it can get overwhelming. Keep things straightforward. The simpler and cleaner the map, the easier it will be to navigate when it’s time to study.
Another pitfall is focusing too much on aesthetics. Sure, it feels good to make a pretty mind map, but that’s not its main purpose. The most important thing is functionality. Organize your ideas logically and focus on how they connect rather than trying to make the map look like a work of art. If it’s difficult to follow, it’s not serving its purpose, no matter how nice it looks.
Lastly, creating static maps can be a big mistake. Mind maps are meant to evolve as you study, so don’t create one and forget about it. As you learn more, add to your map, refine connections, or even reorganize sections if needed. An outdated map won’t help you much when you're preparing for a test, so keep it fresh and up-to-date.
By avoiding these common mistakes, you’ll create mind maps that are not only effective but also efficient, helping you study smarter and retain more information.
7. Tools and Resources for Effective Mind Mapping
Now that you’re familiar with how to create a mind map and the mistakes to avoid, let’s talk about some tools and resources that can take your mind mapping game to the next level. These resources can make the process easier and even more fun, whether you prefer digital tools or going the old-school route with pen-and-paper.
For those who enjoy using digital tools, there are several apps and platforms to help you create your mind maps with ease. MindMeister is a popular choice, offering an interactive platform that makes it easy to create and share your mind maps. It’s also great for collaborative study sessions, as you can invite others to contribute in real time. Another solid option is XMind, which offers a wide variety of templates and cloud storage, so you can access your maps from any device. If you prefer something simple and intuitive, Coggle might be the tool for you—it’s easy to use and perfect for creating clean, organized maps. For more structured mind maps, Lucidchart is a great choice, especially if you’re working on flowchart-style maps or need to break down processes and timelines.
Of course, if you’re someone who loves the tactile feel of paper, there’s no need to shy away from the classic pen and paper approach. Grab a big sheet of paper, some colored pens, and sticky notes, and start mapping away! The hands-on nature of this approach can help you get more creative with your connections and might even aid your memory retention.
If you’re new to mind mapping and need a little inspiration, templates and examples can help you get started. Websites like Pinterest and Google Images have tons of mind map examples for different subjects. Just search for things like “history mind map” or “math mind map” and find one that resonates with your learning style.
If you want to dive deeper into mind mapping, there are also great books and tutorials out there. The Mind Map Book by Tony Buzan, who invented mind mapping, is a fantastic resource if you want to learn more about the method. You can also find tutorials on YouTube that offer step-by-step guidance on creating effective mind maps.
With these tools and resources at your disposal, you’ll be able to make mind mapping a regular part of your study routine. Whether you’re using digital tools or going old-school with pen and paper, these options will help you study more efficiently, stay organized, and ultimately retain more of the information you need.